No Bake Greek Yogurt Dessert Cups: Easy Berry Recipe
These no bake Greek yogurt dessert cups layer honey-vanilla yogurt, fresh berries, and loose graham cracker crumbs in four small glasses. The yogurt stays thick and spoonable, while the crumbs add a simple contrast. There is no oven step, cream cheese filling, or gelatin to dissolve.
Use plain strained yogurt and fruit that has been gently dried after washing. Those two details help the cups hold a clean layer without collecting a puddle of berry juice. The recipe makes four dessert portions, with nutrition estimated for one whole cup.
Why Thick Yogurt Makes Better Dessert Layers
Greek yogurt is strained, so it generally has more body than ordinary unstrained yogurt. That thickness supports a fruit topping without needing a separate thickener. A plain base also lets you control the amount of honey rather than starting with a sweetened flavored product.
For no bake Greek yogurt dessert cups, choose texture as well as the label. A very loose yogurt will settle into the crumbs more quickly. If there is a clear whey layer on top of the container, pour off obvious excess liquid gently before measuring.
Ingredients for No Bake Greek Yogurt Dessert Cups
Plain nonfat Greek yogurt
Use two cups (450 g) of plain nonfat Greek yogurt for the four-serving batch. This is the yogurt used for the nutrition estimate. A 2% or full-fat version can work, but changes calories and fat, and different brands vary in thickness and protein.
Do not assume a large flavored yogurt container has the same sweetness or nutrition. Check its label before changing the honey amount. If you use ordinary yogurt, expect a looser dessert rather than the same thick layer.
Honey and vanilla
Two tablespoons (42 g) of honey and one teaspoon of vanilla flavor the yogurt. Stir until the honey is evenly distributed, without golden streaks collecting at the bottom of the bowl. The base is lightly sweet, and the fruit contributes its own sweetness.
Maple syrup is an optional flavor variation, but its taste differs from honey. If you change the sweetener or quantity, adjust the nutrition estimate. Start with the measured version before adding extra sweetener to every layer.
Fresh strawberries and blueberries
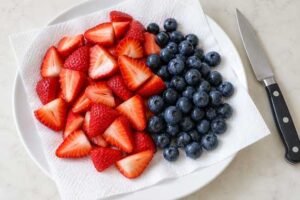
Use one cup (150 g) of mixed berries. Remove strawberry stems, slice the strawberries, and leave small blueberries whole. Pat the washed fruit gently dry so water from rinsing does not dilute the yogurt.
Fresh fruit works best for these no bake Greek yogurt dessert cups. Frozen berries release liquid as they thaw and can stain or loosen the layers. If you use thawed fruit, drain it thoroughly and expect a softer, juicier result.
Loose graham cracker crumbs
Use ½ cup (60 g) of crushed plain graham crackers, divided between the glasses. The crumbs are not mixed with butter and pressed into a crust. They stay loose, then soften where they touch the yogurt.
Cracker brands and crumb size change how much fits into a measuring cup, so weighing is helpful. Use the same weight when checking the calorie estimate. Granola is another topping option, but has a different texture and nutrition.
Choose Four Glasses With Room for a Spoon
Four clean 8-ounce (240 ml) dessert glasses leave space for the crumb base, yogurt, and fruit. Wide openings make layering and eating easier than narrow-neck bottles. Small food containers also work when you want to carry the dessert.
Keep the serving glasses dry before adding crumbs. A wet glass can soften the base before the yogurt goes in. Have covers or food-safe wrap ready so the cups can stay protected in the refrigerator.
How to Make No Bake Greek Yogurt Dessert Cups
1. Flavor the yogurt

Stir the yogurt, honey, and vanilla in a mixing bowl until the mixture looks even and creamy. Use a spoon or spatula to reach the bottom and sides. Keep the bowl chilled while you prepare the fruit.
2. Dry and slice the berries
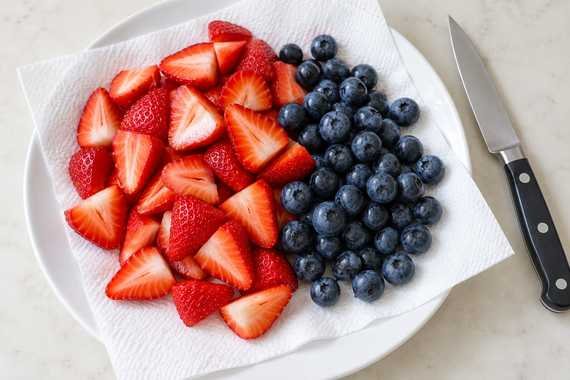
Wash the berries and gently dry them with a clean towel. Remove strawberry stems and cut the fruit into small slices or pieces that fit on a spoon. Keep any visibly juicy or crushed berries for another use if you want neat layers.
3. Build the layers
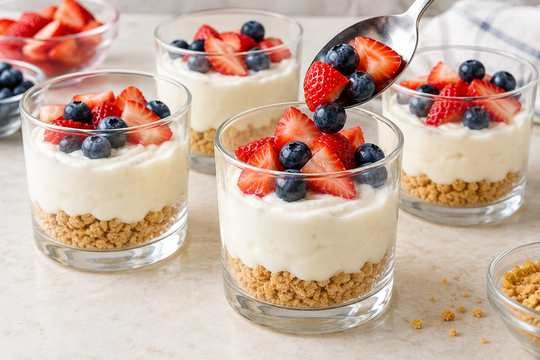
Divide the graham cracker crumbs between the four glasses, about 15 g per glass. Spoon one-quarter of the yogurt mixture into each cup, then share the berries evenly over the tops. Avoid packing the crumbs firmly into a hard base.
The no bake Greek yogurt dessert cups should have similar amounts of each ingredient if you want the serving estimate to be useful. A cup with most of the crumbs and honey is not nutritionally equivalent to one with mainly plain yogurt.
4. Cover, chill, and serve

Cover the glasses and refrigerate for about thirty minutes before serving cold with a spoon. Chilling keeps the dessert cold and lets the flavors settle together, but does not turn the yogurt into a firm cheesecake filling.
If you prefer a crisp crumb layer, keep the crumbs separate and add them when you serve. Crumbs placed under yogurt will gradually soften; this is normal for a layered dairy dessert. Choose the version that suits the texture you enjoy.
Cook’s Notes: Keeping the Layers Clear
The yogurt looks watery
Check whether the yogurt was strained and whether the fruit was dried. Extra berry juice and a thin yogurt can make the cups loose. Start with a thicker plain product rather than trying to fix the assembled dessert by stirring in more dry crumbs.
The crumbs have softened
That is expected when crumbs touch yogurt. For crunchy no bake Greek yogurt dessert cups, store the crumb topping separately and sprinkle it on at serving. An assembled crumb base is more like a soft layer than a crisp baked crust.
The dessert is too sweet
A flavored yogurt or sweet cracker brand can add more sweetness than you expected. Use plain yogurt, measure the honey, and taste the yogurt mixture before assembling. Fruit sweetness also varies from one batch to another.
The glasses look messy
Use a smaller spoon and add yogurt to the center rather than dragging it along the rim. Wipe small spills from the outside before covering. The dessert does not need perfectly even stripes to taste good, but clean rims make it easier to serve.
Flavor Variations Without Changing the Method
For a different fruit topping, try diced ripe peach, raspberries, or a small amount of banana added close to serving. Keep fruit pieces small and account for extra juice. A little cinnamon can flavor the yogurt without adding a separate layer.
For no bake Greek yogurt dessert cups with a richer base, choose plain 2% yogurt and recalculate using the label. Keep additions like chocolate, nuts, or extra granola separate until you understand the original proportions; a large handful changes both portion size and calories.
More Desserts and Breakfast Ideas
If you prefer a baked small dessert, try our small batch brownies for two. Our overnight oats without protein powder offer another chilled yogurt-based option with oats included in the base.
For a sweet coffee pairing, our cookies and cream iced latte is a separate recipe. Adjust the drink sweetness to suit the dessert rather than automatically adding more syrup.
Storing No Bake Greek Yogurt Dessert Cups
Keep the covered cups at 40°F (4°C) or below until serving. Assemble up to one day ahead for best texture, and follow any earlier use-by instructions on the yogurt or fruit. The crumbs become softer the longer the dessert sits.
Use an insulated bag with an ice pack if you carry the cups. The FDA’s food-storage guidance says foods that need refrigeration should not sit at room temperature for more than two hours, or one hour above 90°F (32°C).
Do not return a partly eaten cup to the shared batch. Store the portions individually and keep unused crumb topping dry. Freezing the assembled glasses is not recommended for this method because the dairy and fruit can change texture on thawing.
Frequently Asked Questions
Are these dessert cups the same as cheesecake?
They have a creamy yogurt layer, but no cream cheese, gelatin, or firm-set filling. Eat them with a spoon. The graham crumbs soften rather than becoming a butter-bound crust.
Can I make them without honey?
Yes. Plain yogurt with vanilla and fruit is less sweet. Leaving out honey changes calories and carbohydrates, so the original nutrition numbers no longer apply. Taste the yogurt before adding another sweetener.
Can I use a dairy-free yogurt?
A thick plant yogurt may work for assembly, but protein and texture can differ substantially. Read its label and recalculate the nutrition. Dairy-free yogurt alone does not address wheat in the cracker layer.
How do I keep the crumbs crisp?
Keep them in a dry separate container and add them just before eating. Once under the yogurt, the crumbs absorb moisture. Shorter chilling does not completely prevent that change.
A Simple Chilled Dessert
With thick yogurt, gently dried berries, and measured crumbs, no bake Greek yogurt dessert cups make a straightforward cold dessert with clear portions. Follow Platewiser on Pinterest for more dessert and breakfast ideas.
Calories and Nutrition
| Calories | About 180 kcal |
| Protein | 13 g |
| Carbohydrates | 28 g |
| Fat | 3 g |
| Fiber | 2 g |
Estimates are per cup, one-quarter of the recipe, including the listed honey, crumbs, and berries. Yogurt and cracker brands vary. Optional chocolate, nuts, extra fruit, and drinks are excluded.
Printable Recipe
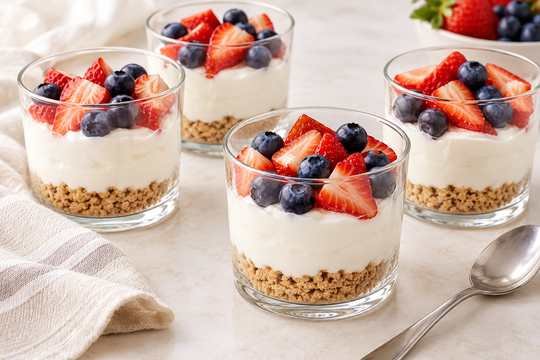

No Bake Greek Yogurt Dessert Cups
Ingredients
Equipment
Method
- Mix 2 cups (450 g) plain nonfat Greek yogurt with 2 tablespoons (42 g) honey and 1 teaspoon vanilla extract until evenly combined. Keep the mixture chilled while preparing the fruit.

- Wash and gently dry 1 cup (150 g) mixed strawberries and blueberries. Remove strawberry stems and slice the strawberries. Use fresh fruit without pooled juice.
- Divide ½ cup (60 g) crushed plain graham crackers between four clean 8 oz (240 ml) dessert glasses, about 15 g each. Spoon one-quarter of the yogurt mixture over each crumb layer, then divide the berries evenly on top.
- Cover and refrigerate at 40°F (4°C) or below for about 30 minutes. Serve cold with a spoon. For advance preparation, assemble up to one day ahead for best texture; the crumb layer softens. Keep crumbs separate until serving if you want them crisp.



Notes
Get fresh recipes in your inbox
Subscribe to PlateWiser for easy dinners, small-batch treats, and coffee recipes.
Confirm your email to join. Unsubscribe anytime.